If you want to analyze malware files safely in a virtual machine (VM), this guide can help. We will use the following tools:
- Virtualization: QEMU/KVM
- Guest OS: Windows 10
- Analysis Tools: Flare VM
What is QEMU/KVM?
QEMU is a free, open-source emulator that creates virtual machines. KVM is a Linux kernel module that helps QEMU use hardware features for faster performance. Together, they let you run different operating systems on your Linux host.
Virt-Manager gives a simple desktop interface to manage VMs using libvirt, mainly for KVM.
Installing QEMU/KVM on Linux
First, update your system and install the packages. Here are commands for popular Linux distributions:
Debian:
sudo apt update
sudo apt install qemu-kvm libvirt-daemon-system libvirt-clients bridge-utils virt-manager
Arch Linux / Manjaro / EndeavourOS
sudo pacman -S qemu libvirt virt-manager virt-viewer dnsmasq vde2 bridge-utils openbsd-netcat
sudo systemctl enable --now libvirtd
Fedora / RHEL / CentOS / Rocky / AlmaLinux
sudo dnf install @virtualization
sudo dnf install virt-manager
sudo systemctl enable --now libvirtd
openSUSE Tumbleweed / Leap
sudo zypper install qemu-kvm libvirt virt-manager
sudo systemctl enable --now libvirtd
Gentoo
sudo emerge --ask app-emulation/qemu app-emulation/libvirt app-emulation/virt-managerInstalling windows 10 iso
Avoid custom ISOs because they can be risky and not open-source. Instead, install the original Windows and add tools like Flare VM later. Flare VM turns off Windows Defender and makes other changes to help with malware analysis.
Download the official Windows 10 ISO from Microsoft. Go to the Microsoft website and select the 64-bit version.
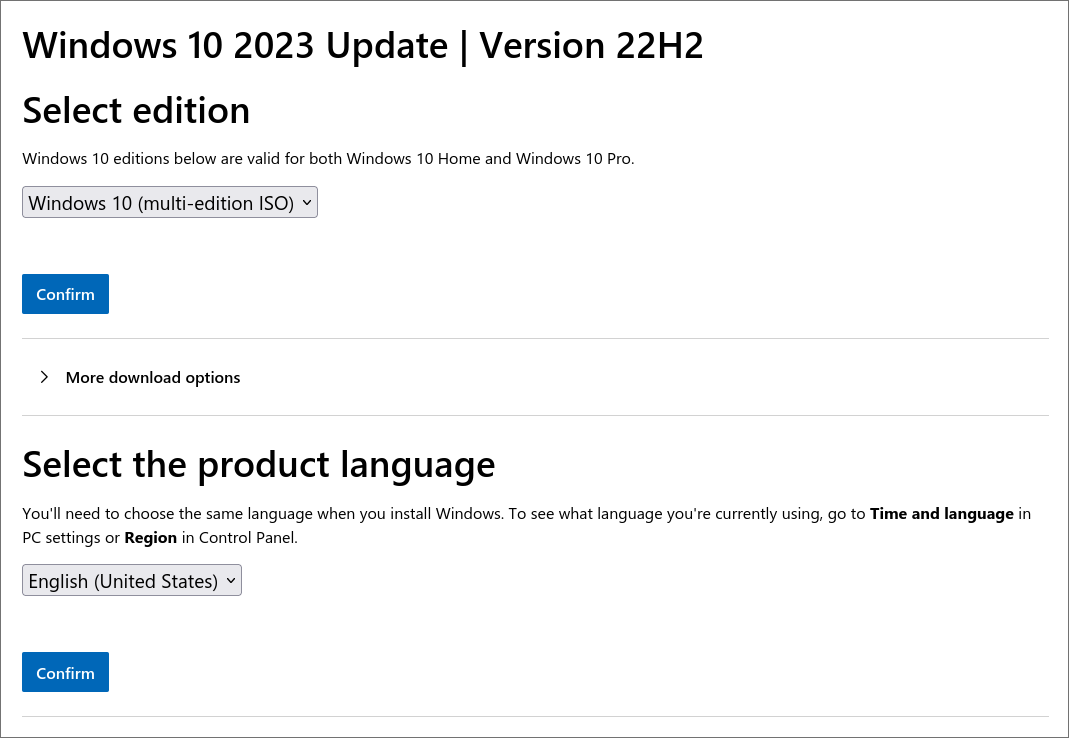
Select this options and install 64 bit iso file.
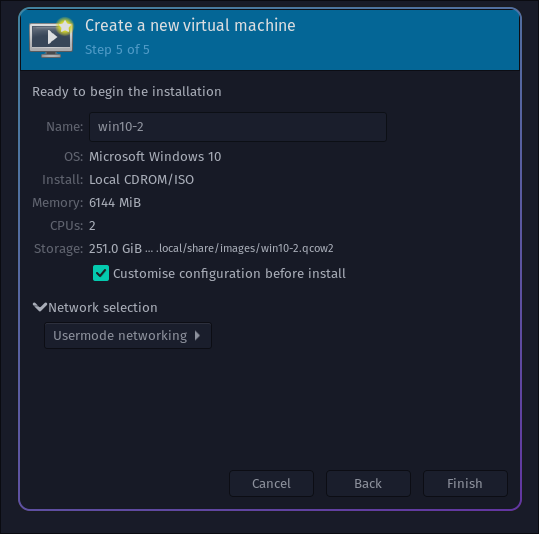
Windows 10 setup on virt manager
Many malware programs can detect VMs so use these settings to make it harder for them:
- RAM: At least 4 GB (higher is better)
- CPU: 2 cores or more
- Disk Space: At least 250 GB
Installing flare VM
Flare VM is a collection of software installations scripts for Windows systems that allows you to easily setup and maintain a reverse engineering environment on a virtual machine.
Flare VM includes many tools for malware analysis. Here are some important ones:
-
Network analysis
- fakenet (Closes internet traffic and captures all packets with detailed.I like this tool because includes file name into packet info)
- wireshark (Captures all traffic on the OS but a little complicated for new users)
- TCPView (We can easily see where each application is connected to which ip or domain ipv4 & ipv6)
-
Dynamic analysis
-
Static analysis
- Ida (Powerful disassembler)
- Ghidra (ree tool from NSA for decompiling code)
- DIE(Detect It Easy) (Identifies file types and packers)
You can follow the installation path in github:
- Open a
PowerShellprompt as administrator(New-Object net.webclient).DownloadFile('https://raw.githubusercontent.com/mandiant/flare-vm/main/install.ps1',"$([Environment]::GetFolderPath("Desktop"))\install.ps1")
- Unblock the installation script:
Unblock-File .\install.ps1
- Enable script execution:
Set-ExecutionPolicy Unrestricted -Force- If you receive an error saying the execution policy is overridden by a policy defined at a more specific scope, you may need to pass a scope in via
Set-ExecutionPolicy Unrestricted -Scope CurrentUser -Force. To view execution policies for all scopes, executeGet-ExecutionPolicy -List
- If you receive an error saying the execution policy is overridden by a policy defined at a more specific scope, you may need to pass a scope in via
- Finally, execute the installer script as follow:
.\install.ps1- To pass your password as an argument:
.\install.ps1 -password <password> - To use the CLI-only mode with minimal user interaction:
.\install.ps1 -password <password> -noWait -noGui - To use the CLI-only mode with minimal user interaction and a custom config file:
.\install.ps1 -customConfig <config.xml> -password <password> -noWait -noGui
- To pass your password as an argument:
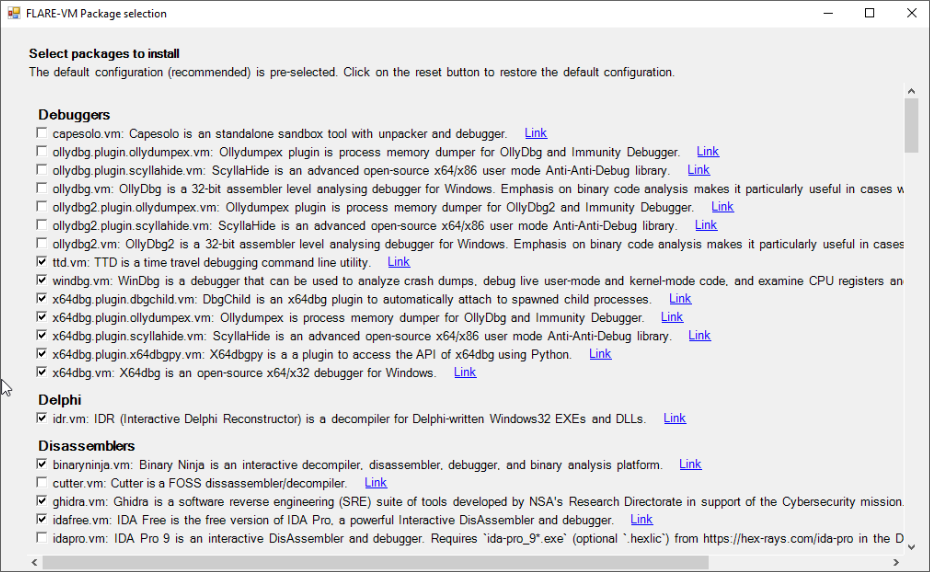
At the package selection select what you want or do not touch it default selections enough.
The setup process can take a while.
You can access tools in tools folder at the desktop and do not forget to snaphot vm.